Although we were on our way to Bing Canyon, we needed to delay for a week due to a break-in. The home we are to live in was burgled multiple times in the last month because it was vacant. The Becks have graciously offered their home for us to live in until a new door and lock has been installed.
Tauni taught me how to braid a floor rug. She provided me with fabric and a huge crochet needle to get started. I really enjoyed working with strips of fabric although it was tough to find an open fabric shop.
While we were at the Becks we reported to the Stake High Council via Zoom. There’s President Flake with his daughter Jennifer. She is such a beautiful young woman. There were other missionaries including Elder Tavin Nieman, who was reporting from Arizona. His family moved out of the area while he was gone.
Katie and Tyler are just an hour away in Snohomish so it’s easy to pop over and play with the kids on the trampoline. Grandpa prefers tickle monster with Naomi.
I always wanted a quilt block on the front of my house. It didn’t matter that we were selling our home, I wanted it on there. Here is how you can make your own!
Purchase or reclaim a piece of plywood that is about 4’x4′. Seal with a good exterior paint.
Draw your design and use painter’s tape to help you paint accurately. There are plenty of designs online. Search “barn quilts” for ideas.
I used little Behr sample paint jars in my favorite colors.
I wanted to paint the front door this pumpkin color, but chickened out. If the house wasn’t for sale, I would have loved an orange door.
Expect dark colors to take two coats due to their heavy saturation.
All done! It is your decision whether to apply a coat of poly to protect it from the weather.
I prefer an on-point setting in most quilts and sure enough, I liked it better on the house as well.
Goodbye, house! This was my final picture, driving away for the last time.
We sold the house in 6 days. Our buyers were so wonderful to let us have extra time to get everything out, especially from the pole barn. It’s tough to get rid of 20 years worth of stuff, but it is just stuff.
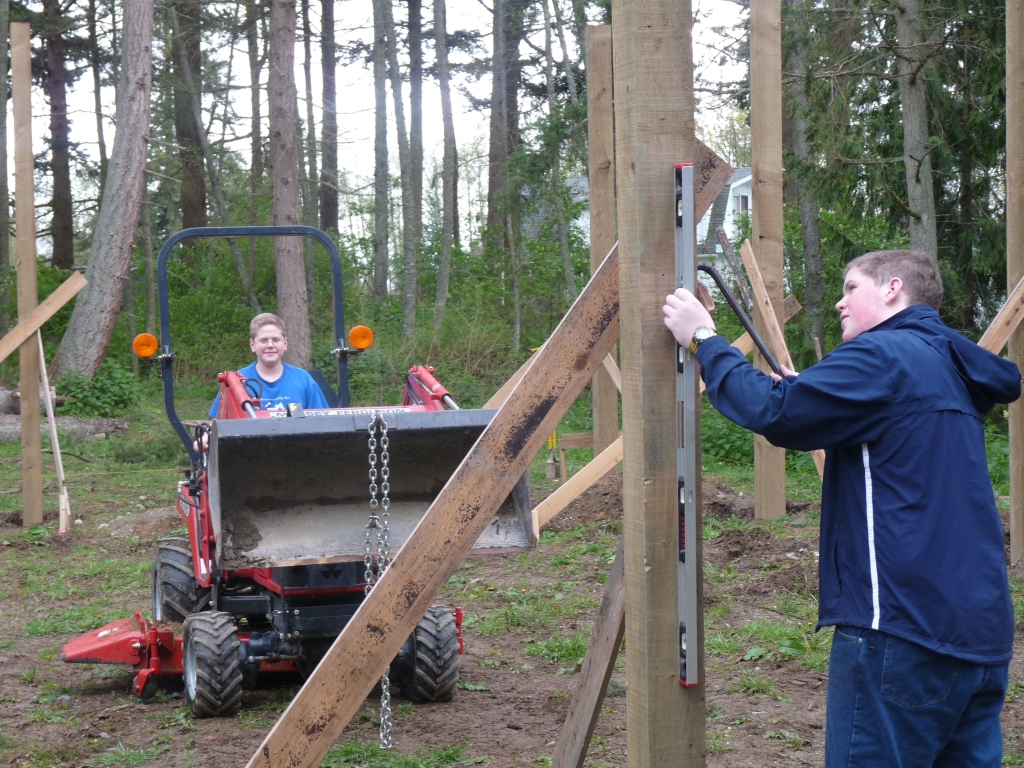
Paul’s dream of building a pole barn began when we bought the property in 1999. He pulled a permit in 2009 to begin the work. The big tractor work of clearing trees and leveling the land was the easy part.
Luckily, none of my children has height issues.
Most days it was a muddy mess.
“Keep pounding, son!”
You can tell by his face that Jackson shouldn’t be on the tractor.
There’s Alex Huff helping out his friends.
Howard and Frazier worked with their Dad on the whole project.
These boys are such hard workers.
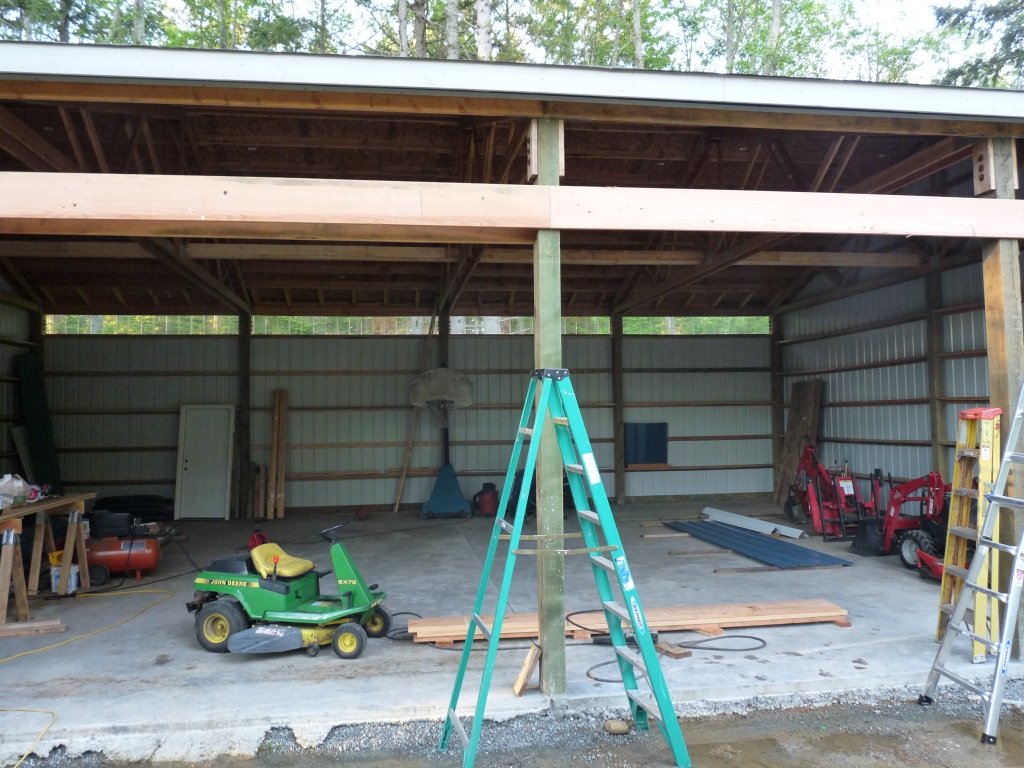
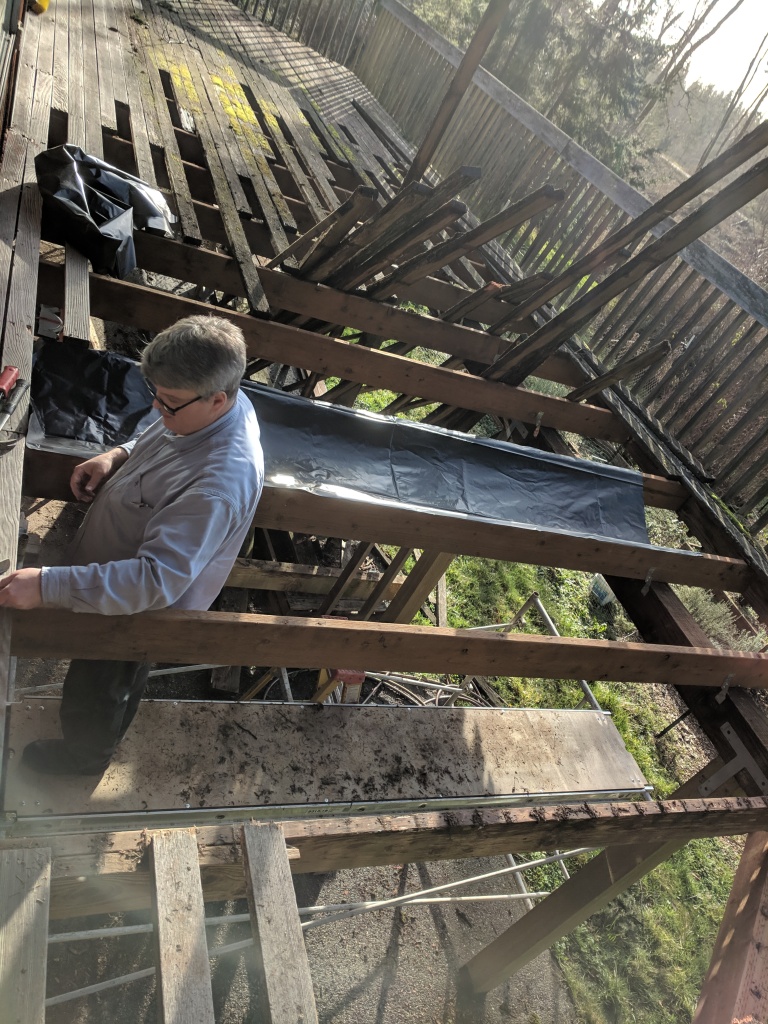
The trusses have been delivered!
Thanks to the Flakes, we were able to have some scaffolding for the trusses. Flash forward 10 years and Jackson would be putting up scaffolding for Boeing.
Occasionally, the digging bars would find something enormous.
Installing the roof. Almost time for the cement to be poured.
It’s time for the cement truck to give us a floor.
Let the curing begin.
Siding up on two sides already.
Time to put the garage doors on.
That huge beam was so heavy for both of them, but they did it.
Trenching for the electrical took out of a few of my plants, but they came right back.
Boy, did we fill up this new garage. Paul did all the electrical work and lighting, then installed a lift.
Oh dear! The trailer lost its hitch and rolled down and crashed. It’s a good think we had extra panels.
It was always nice to have Jack and his tall, strong friends come by.
BeforeAfter
We heard back from our realtor that the buyer wanted to see this before going in the house. Thank goodness they weren’t put off by the amount of stuff in here. Boats, cars, tools; it was a mess. As I was doing the final sweep when it was clean, I thought I should take a picture, but I walked right out and locked the door before I remembered.
There is so much more work still to be done. We have a mud room that leads to the garage and the office that is stuck in the 70s. One of the bedrooms has mauve carpet. And the piano had to go.
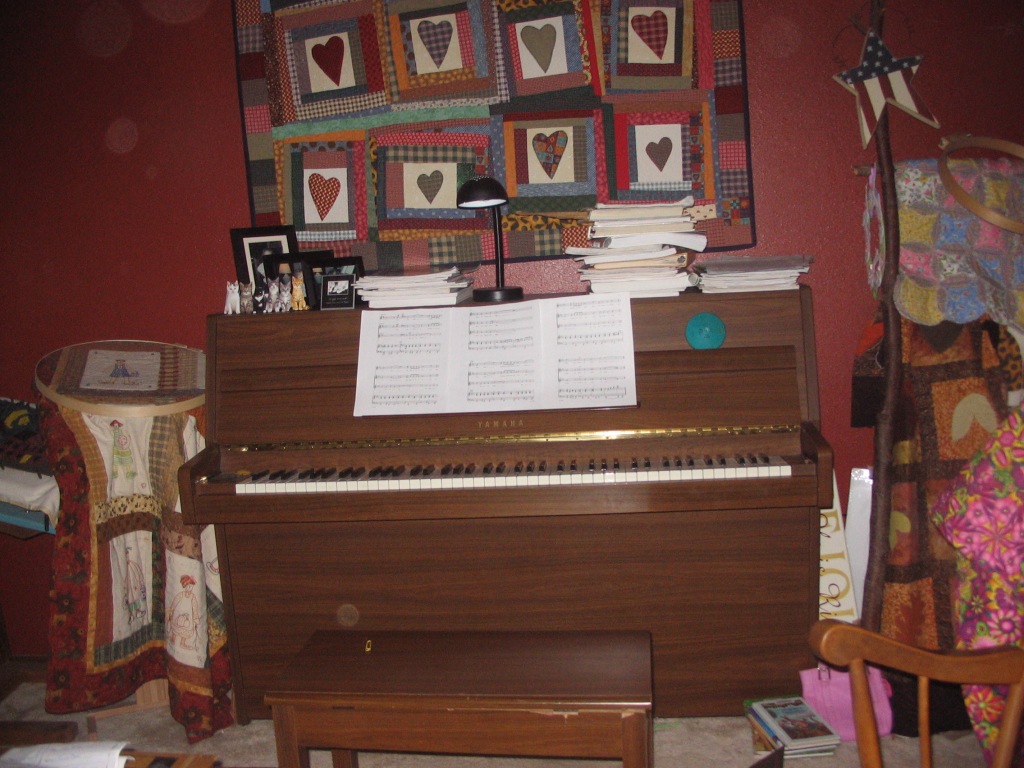
Do you remember when having a red wall was in style? It looks like I’m an old cat lady teaching piano in my spare time. Yikes.
My friend and stager, Susan Payne, helped me put everything in order. And one of my former piano students bought my Yamaha. My mom bought it for me when I was 16, so I was sad to see it leave.
I made this using no pattern, just improvisational piecing. The actual sewing of pattern-on-pattern fabric makes me so happy. I threw the house in the middle and added strips here and there in black and white. At the end I decided it needed a title, so I pieced some low-volume prints and made bias from the border butterfly print. Then I channeled my inner Moana.
I love these borrowed pieces. My style can adequately be described as, “Early Marriage,” so I was very grateful for friends who could lend me their class.
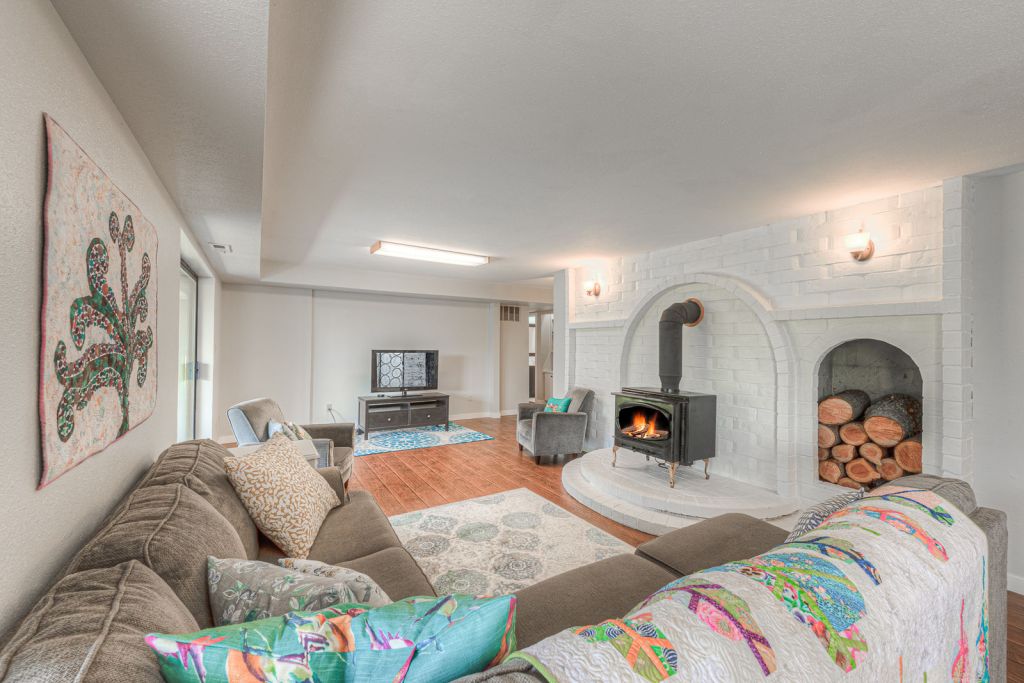
With a fireplace running through the middle of the house, design can be particularly difficult. But I love the texture it brings. Plus, the fire can be seen from both sides.
I was so happy when the new owner purchased Island Love so it could return to its home. The deck doubles the space of this room and is so inviting.
One Sunday when light carpet was still under the dining table, a child dropped their plate of pancakes. It landed upside down. That was the day Paul pulled out his carpet knife and drew a line across the living room.
The guest room matched the bathroom in its choice of mauve.
Although it worked as a guest bedroom for us, it was better staged as an office. It just needed new paint and carpet.
The mud room is between the kitchen and garage entrance. It includes laundry and a full bathroom. These cabinets were built in situ by the builder. They didn’t close well, but were real wood, so refinishing was a good option.
General Finishes Gel Stain doesn’t require any prep to the wood. However, you do need to remove them to apply flat. This Java color matched the kitchen cabinets so well, it was shocking.
Because the original door to the office was a pocket door, Paul installed a hollow door that could be locked. I painted it white and we trimmed it out.
The General Finishes Gel Stain did an amazing job with these cabinets. I replaced the handles and the hinges. And I bought magnetic catches so the doors would stay closed. This is what the office normally looked like.
The office was the only place we could fit the longarm in the end. It lived here for just a few weeks. If we’d had time, I would have painted this paneling, refinished the floors, and changed the closet doors.
One night I decided it was time to take this up. I hate laminate flooring. The bathroom on the right had a different laminate, but it would all be replaced in one fell swoop: from the garage door, through the bathroom, toward the kitchen, and to the near right toward the office.
Making piles of similar tiles so the final product looks random.
After doing the basement, this was super easy. We were lucky to have a Floor ‘n Decor open in Everett.
I used that utility sink so much for fabric dyeing. I wish I had a picture of the bathroom, but forgot to take a single one. Well, I think I have one when we stuck the baby chicks in there during a snowstorm.
I loved learning to use chalk paint to refinish thrift store finds. Here are a few of the pieces I refinished.
I bought this Singer Red-Eye for $200 in downtown Seattle around 2005. I bought a new leather strap and actually used it when the power went out. The top was in pretty bad shape, so I decided it needed some chalk.
I didn’t have to do much to take the pieces apart. The machine itself lifts down and stores away and the lid closes shut nicely. I smile when I think of my Bernina kick pedal that places the needle down perfectly. Thank you, Isaac Singer.
Rustoleum Chalked is a good product for items that would be easier sprayed than brushed on.
This $5 filing cabinet needed a little help and now looks great as a night stand.
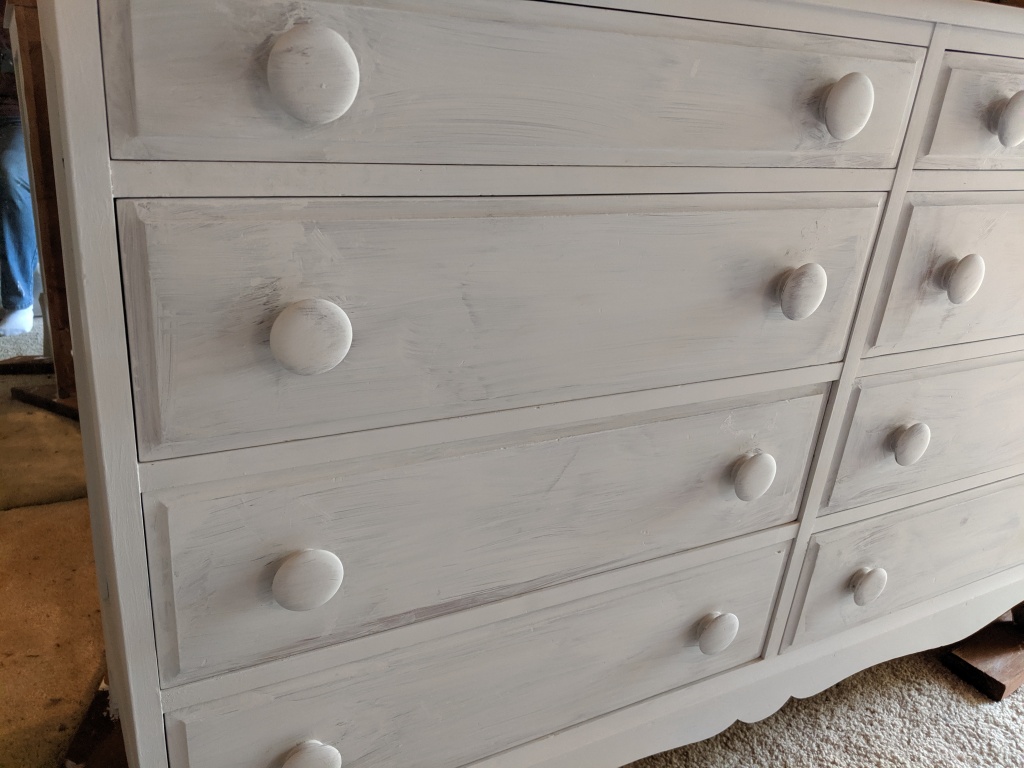
Grandma Willard gave us this wonderful dresser about 25 years ago. The top had many water rings and discolorations, so we decided to give it a makeover. We also removed the mirror that was attached to the back.
After one coat, it looks very splotchy. On a regular paint refinishing project, I would take off the knobs, but this works better to leave them in place.
Grandma would be happy to see her dresser brought back to life.
This flip-top Singer sewing machine still works, but works better as a nightstand. I usually take some sand paper and hit the edges a little.
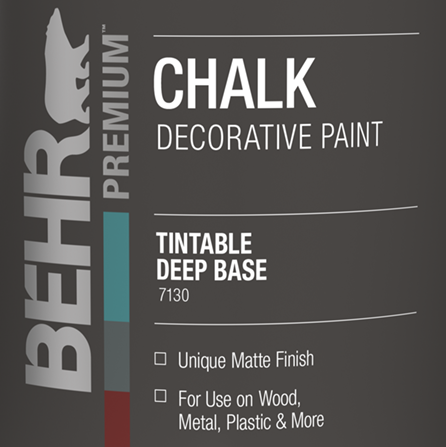
This is my favorite chalk paint. The tintable colors are amazing and it is so easy to use. The best part of chalk painting is the no-prep. Seriously, I want to start painting, not sanding and stripping.
Always wipe on wax when you are finished painting.
It’s always fun to find thrift store furniture to practice on. How bad can it turn out? Give it a shot.
How I love roses. Almost as much as the white-tail deer living all around me. This means the fence must be at least 7′ tall. They still get in, but they are caught, and then eat everything.
Paul and I built these beds in 2011. The big beds are 16′ long.
Eight years later they are filling in well. In the far left corner are some amazing golden raspberries.
I never could identify this wild double rose growing on the property. It ran along by its own roots and would not be fenced in.
Shrub roses are my favorite since they are so low-maintenance.
For the first few years I planted vegetables. Eventually the roses and lavender took over.
I’m sorry, the buffet is closed.
These huge poppies were left by the previous owner and only needed propping up to look beautiful.
In the front yard there was a dilapidated pond. One day there used to be fish in here, leftover from a child’s fishbowl. But the roots of the yews were penetrating the liner and it was a goner.
A neighbor’s ram got loose one day and got a drink from our pond. Usually it only attracted deer and raccoons.
I cut the yews back hard, took out the great rocks to use later, and threw out the liner.
Much better. Now to replace the rocks and put on that wheelbarrow in the background.
Since it was fall, a bunch of chrysanthemums was a perfect addition.
How in the world do we solve this problem?
We needed to have bonfires regularly on the property because of wild weather. This is Marnie teaching Pam’s mom, Luciene, how to roast marshmallows. This was her first trip to the US from Brazil.
This is the view I will always miss. Walking back from getting the mail in the autumn weather. It smells so fresh and cool, with a little crunch under my feet.
My friend Stacey would say that the weather in the Pacific Northwest is like a long-distance relationship. In the summer, the sun emerges and we are outside everyday, all day, like welcoming a lover arriving from abroad. Then the fall arrives, the loved one leaves, and we retreat to our homes, to our fires, books, and quilting. We’re exhausted. And we welcome the return of the rain.
I’ve learned so much about landscaping since we moved to the Pacific Northwest. Everything grows, so I had to be carefully about what I planted. And yes, I did plant black bamboo and worked perfectly. My conclusion: Japanese with Mediterranean influences work best.
This was our first week in the house–August 1999. I quickly learned these Portuguese laurels wanted to be 30′ tall. If we weren’t walking through spider webs, we’d be soaking wet by the time we got to the front door.
Here’s the view from the front door.
We pulled them all out to prepare for new beds. Meanwhile we painted the house a reddish-orange color.
The bed on the left was very wet so we pulled out the rotten deck and killed what remained. Rhododendrons on the right and camellias are on the left. This is Cecil, the Rhodesian Ridgeback, named for Cecil Rhodes.
I used layer planting with cardboard over the grass and yards of good planting soil on top.
When we reroofed, we took the opportunity to check out the design. The granite border rocks came from the Willard cabin in Baring.
We hired a cement lifter to raise the landing that had sunk to the left. It worked so well for $800, we highly recommend Northwest Poly Services. Johnny Huff was the man with the skills.
Most of these plants were in little pots when they came here, but they seemed to love it. It’s so important not to crowd plants at the beginning. They will fill in fine.
The deck. How it needed repair. Paul decided to put a barrier on a slope so the patio underneath would stay dry. It was so much square footage to replace.
Our friend Roger Skinner really saved the day. He would pack his lunch and come work all day with Paul. The tool that Paul used the most is made by Camo. It allowed him to place the screws on the side of the board instead of the face. Camo Marksman Pro is available at Home Depot and Lowes.
They did such an amazing job and never fell off the deck.
The Becks let us borrow this cute outdoor dining set and the sister missionaries came over and helped paint one afternoon.
After waiting seven years for my wisteria to bloom, we had to cut it back in order to rebuild the deck.
I may have waited a wee bit too long to give it a trim.
This is outside the dining area. It wraps around the office and includes an exterior door and staircase. I had to leave this beautiful white lilac because the scent wafts into the kitchen sink window.
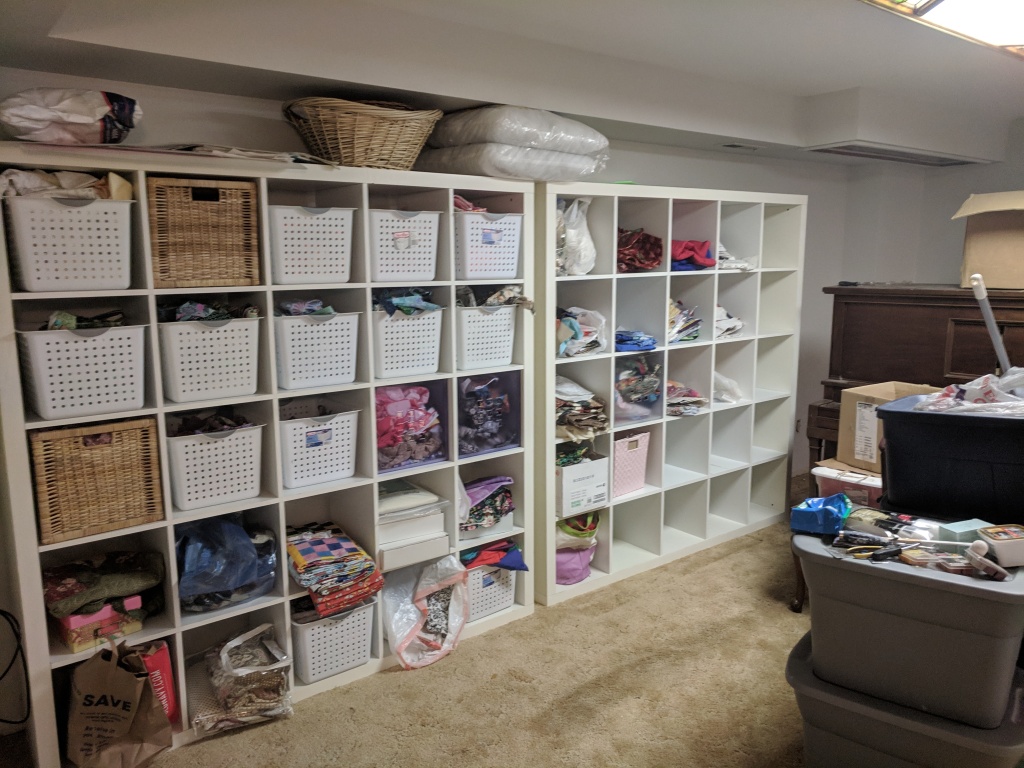
Part of the reason I loved this basement when we viewed the home with our realtor was the ability to put in a longarm quilting machine. It would keep me busy for the next 20 years.
My quilt storage came from this IKEA Kallax pair. It really served me well for 20 years. I sold them to a neighbor and they are probably still going strong.
Here I am in this room, showing off my longarm skills.
This is the room where my longarm was for most of our years here. With the Kallax shelves out, it is a wonderful space for creating. I also painted the cinder blocks on the left.
Detail of the wall quilt: Sarah Fielke came to Mount Vernon from Sidney, Australia to teach this class. What a delight! I learned a lot about her starting Material Obsession with Kathy Doughty. I was happy with my Y-seams at the end of this project.
Way down at the end of the hall is this fused piece I made. Frieda Anderson shows this process in her book, “Fabric to Dye For.” How I love orange a blue together.
You’ll see these little class samples pop up in the house. My friend and stager, Susan Payne, encouraged me to use them as artwork.
These are the same bricks as the fireplace upstairs. But with the dark grey grout, they look so much worse. I will have to refinish these with Masonry paint. It wouldn’t hurt to paint the stove either.
There were a few broken bricks I needed to replace. Luckily, the previous owners left a stash in the garage. Here I am grouting in my skirt and Romeos.
I had to grind down the grout under the bricks to fit in the flooring.
I’m so nervous! We had to come at this from two different rooms. We are just hoping we were straight and will meet perfectly in front of the fireplace.
It matched just perfectly! I was very nervous it wouldn’t match, but it worked fabulously!
After a nice spray of Rustoleum HighHeat, the stove is ready to be reinstalled. I used Behr Masonry paint on the bricks.
Paul needed to grind off some high spaces so the flooring would lie flat. You never notice these with carpet.
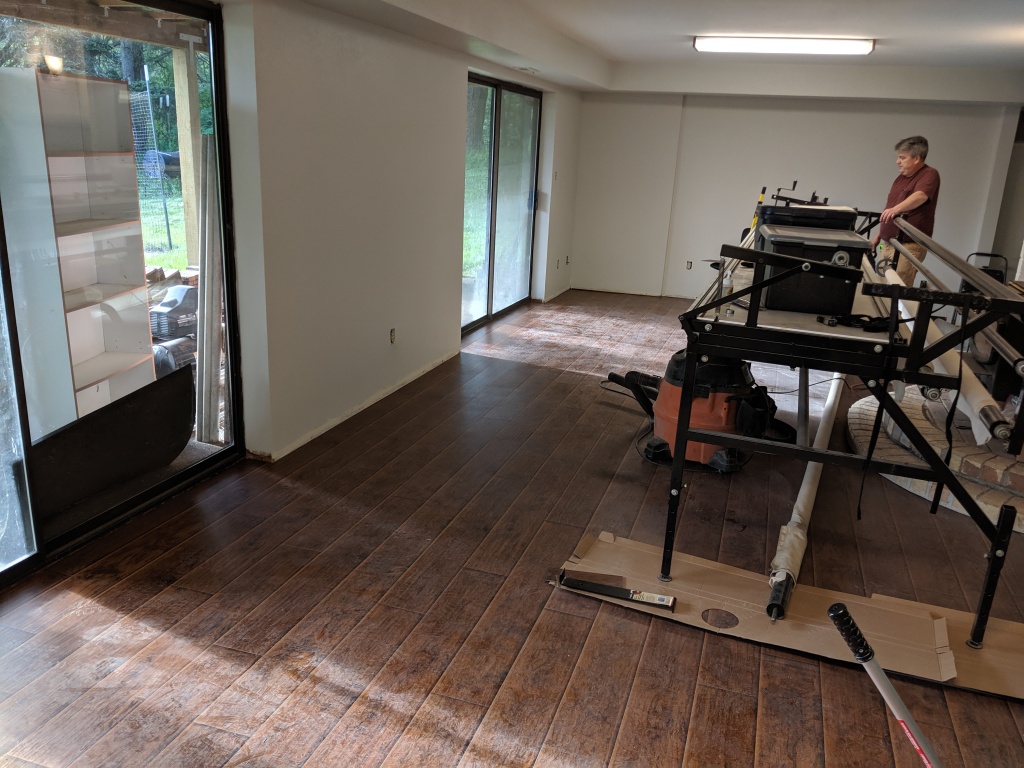
We moved the longarm back when we finished. Here is Paul enjoying his handiwork.
I’ve always loved the sliding glass doors to let in the light. I grew up in one as a child. Basements can sometimes be dark dungeons, but this one had good lighting.
After removing my huge cutting table, it looks like vast open space. But man, there were hundreds of pins in that carpet.
I bought 4-5 rugs on Wayfair for staging. They set certain areas apart, which is helpful in a large, long, box of a room.
Detail of the wall quilt above. I hand dyed all the Radiance silk used in the colored star.
My friend, Tauni Beck, lent me a lot of furniture pieces. This little rocking chair is so cute.
On the couch is a Scott Hansen pattern “Painted Forest.” It is a great way to show off all my favorite Kaffe Fassett and Free Spirit prints.
That’s much better. However, I think the rounds we put in the storage cubby won’t fit in the stove.
This piece on the wall is one in a series of four trees for a design class with Lorraine Torrance. It is all fused and quilted to death.
I don’t have any pictures of me painting and installing baseboard (boring!) but it took a long time. My friend Laura DeFreese came over and helped me paint for a few days. It was such a wonderful gift of her friendship and loved the time we could spend just chatting.
The large basement of this house had rarely been used when we moved in. But my children took it as a challenge to personalize each of their bedrooms. We had blue walls and purple walls. There were plastic stars and posters and mirrors. That all had to go.
Starting in the corner of the house, I started painting all the ceilings. I didn’t realize until then how dingy they looked.
I always think of this as Howard’s bedroom, although most of the children took a turn in here. The new flooring solved all the damp, mildewy smell.
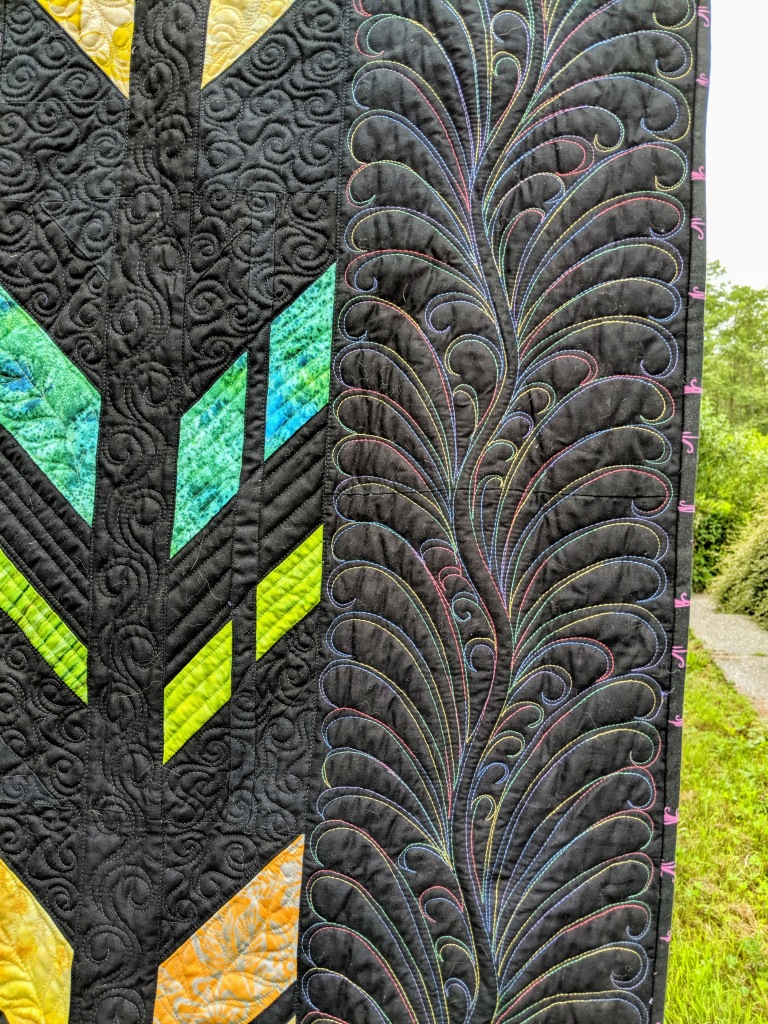
On the bed is this Alison Glass Feathered quilt. Variegated thread really shows on black. Might as well show off.
Marnie painted her room this a lovely lavender color.
It needed just a little help. I think the closet doors had never worked, so we finally bought new ones.
On the wall in Marnie’s room is this little sampler. It is a class piece that I did with Lorraine Torrance. How many different ways can you make a leaf?
On Marnie’s bed is this leftover quilt. These half-square triangles are the throw-aways from an X+ quilt I made earlier.
This large room just needed new paint and flooring.
I love mission style furniture and this queen bedroom set fit nicely in this room.
The wall features Organized Chaos by my friend Sujata Shah. Chuckles the Silly Kitty approves.
Between the bathroom and the storage closet is the open shelving. The 1″ tiles began popping off in around 2001. It was an easy job to tackle.
Four 12″ tile sets from Floor ‘n Decor finished the top off nicely. Kinda quilty and it cost nearly $10.
A little paint and hardware and we’re done.
We added a louvered door to the storage area. It has a water heater for this side of the house and we keep food storage in here.
I feel bad looking at these before pictures. The kids really didn’t deserve such a terrible bathroom!
My favorite tool for this job. Thank goodness it’s a small bathroom.
Gutting the floor wasn’t very hard; demo is the easy part. This is the only bathroom in the basement and was heavily used.
We didn’t want to tear all this out, especially since it was in good condition, especially the cast iron tub. So I decided to just paint it.
Painting the tile and tub turned out great. I added a little caulk to the edges afterwards to clean it up. I would definitely recommend Rustoleum Tub & Tile Refinishing Kit. It took 2 kits to complete the job.
I like installing 12″ tiles much better than 24″ x 12″ tiles. Easier cuts too.
Almost finished! Every single water closet connection needed to be raised in this house. They all had been installed before the finished floor was installed.
This was a $5 thrift store find. I used Rustoleum spray paint and found some cute knobs at Hobby Lobby.
Finished bathroom and yes, I turned the shelf upside down for easier access.
With 20 years of hard wear and 3400 sq. ft. to work with, the opportunities to update were everywhere. We couldn’t do everything we wanted, but we did feel that all the doors and baseboards needed to be changed. That alone makes a huge difference to bring a house from 1979 to 2019.
Master bedroom slider to the deck. The ceiling is dark for two reasons: the cedar tongue-and-groove and the lack of light fixtures.
We replaced the lights and started painting the ceiling and the walls.
I think we should get rid of this beige carpet.
How I love that quilt on the wall. It sold 30 minutes after I listed it. The white ceiling now lightens the whole room.
Paul made me the quilt hanger and I chalk painted it, along with the bedroom furnishings.
Quilting is in the details. For EPP quilters, I hand-basted these hexies, removed the papers, and glued them onto the white fabric. Then I took the whole piece to the longarm and quilted everything into place.
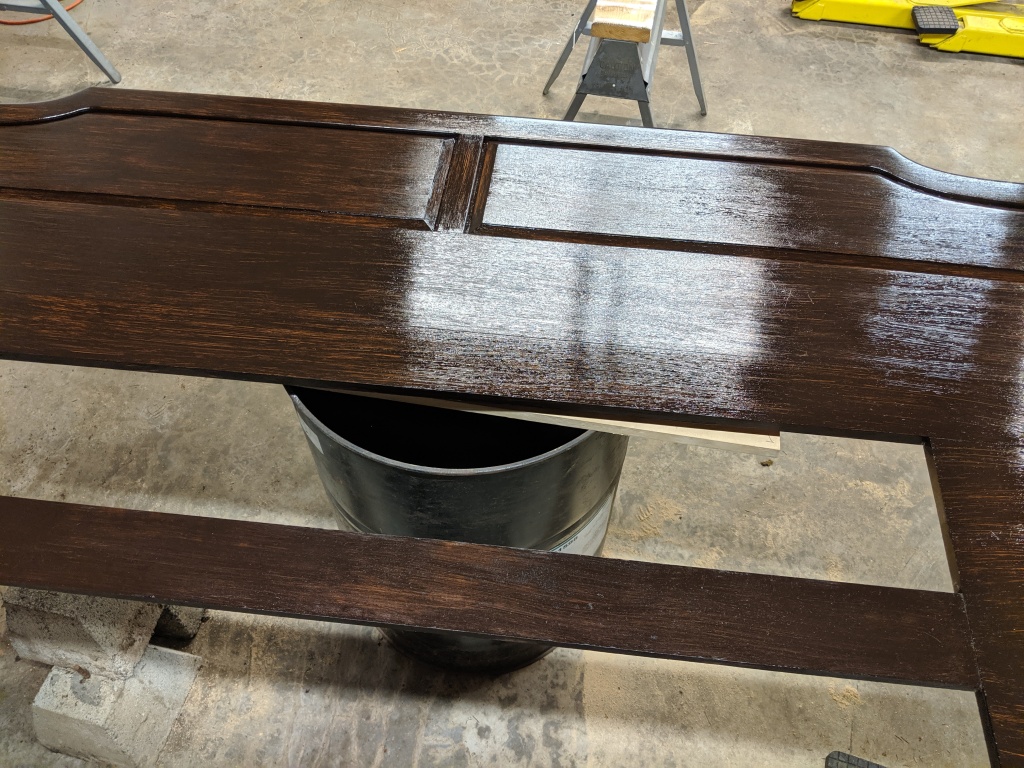
My parents gave us their king sized headboard 25 years ago. It is a beauty made of pecan hardwood. It looked a bit dated, so I decided to give it color that would match the bathroom furniture.
Here is two coats of General Finishes Gel Stain in Java. This is the same color as the mud room cabinets. It goes on like a dream. A little poly afterwards keeps it looking great, in either matte or gloss.
Now onto to the master bath. Who doesn’t like a red sink? Also, notice demo should be done with Chaco sandals.
Before we bought the home, some water damage from a leaky skylight stained the ceiling and brought out the dark tannins. This meant the entire bedroom needed to be sealed and painted. I looked at that for 20 years, too afraid to do anything. But I enjoyed that wonderful light fixture.
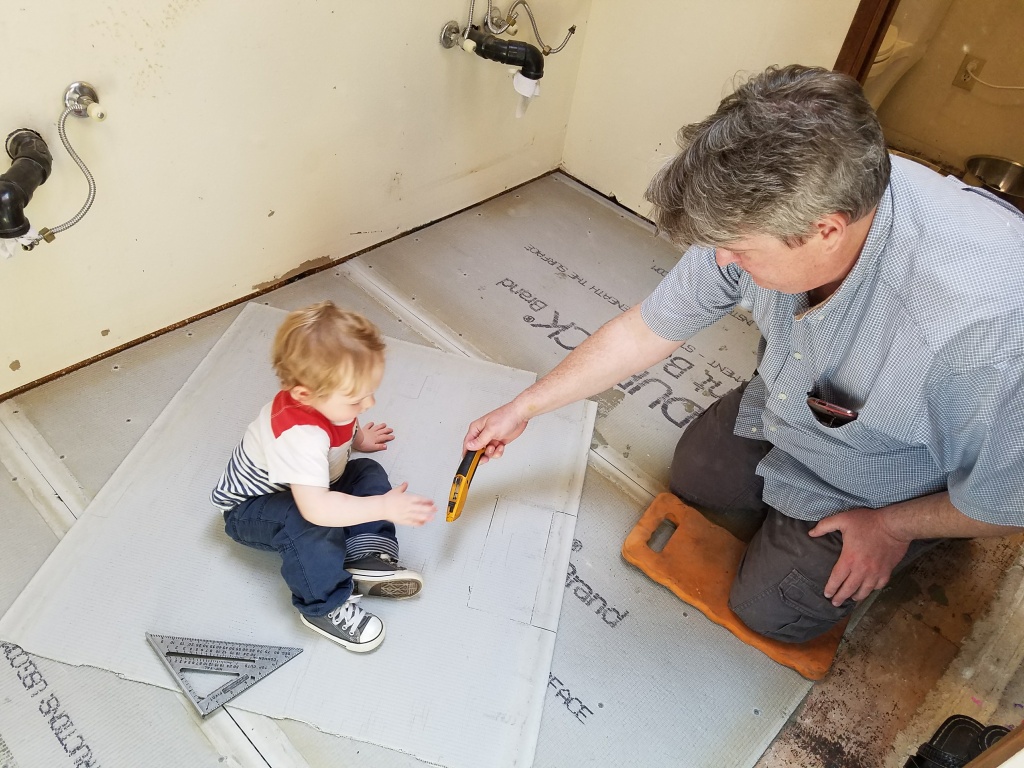
Now that the vanity is out, Jim can start cutting the cement board.
Wayfair saved me on this light fixture. I needed something wide, short, and with a tiltable base. After months of looking, I found this perfect piece.
Plenty of room for a big tree right there. With the carpet gone, we were able to combine the flooring in the toilet/shower room with the vanity area. This Costco vanity matches the headboard nicely, too.
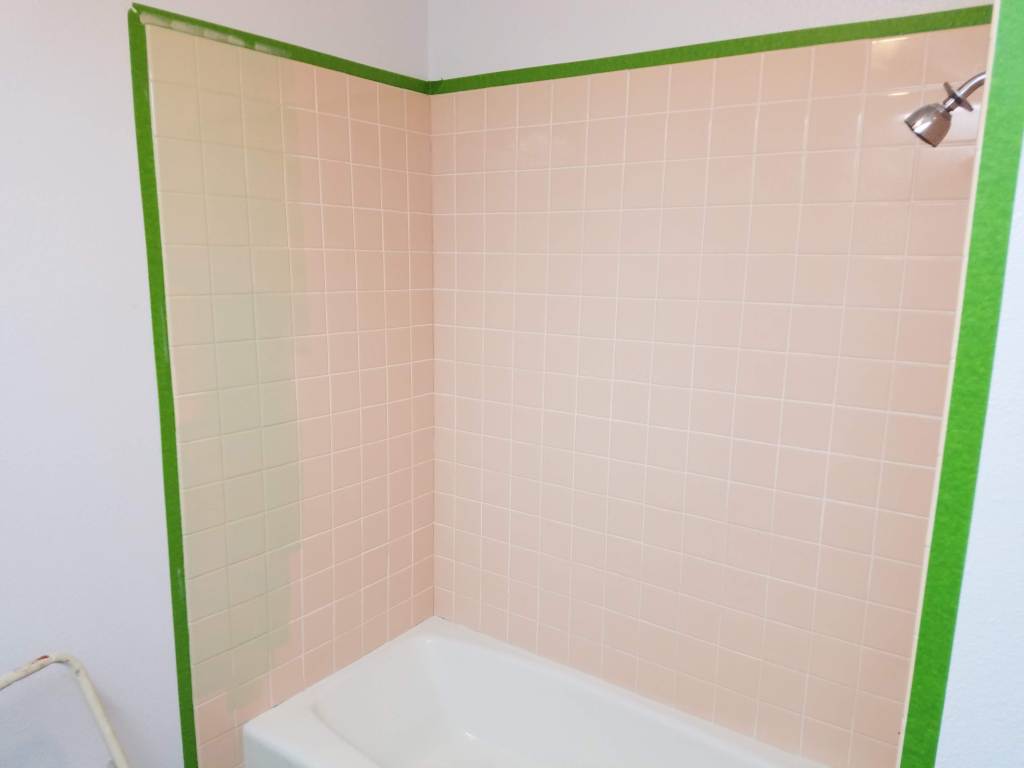
We replaced the entire shower surround (2″ tile) with this piece from Home Depot. I think they sent us three of them before we had one that was undamaged. Also, I hate drywall work, so we hired a local to finish.
This Wayfair drum light makes me think of Frank Lloyd Wright.
I think I might go downstairs tomorrow. The basement was the children’s domain mostly, so I waited for them to move out to get started. It was then that I realized the quilting had taken over everywhere.